Friday, 16 November 2012

Pancakes: BEST, accidentally vegan

I think I bake when I get excited and nervous..
This morning I woke up at the crack of dawn and wanted to do one thing: cook. What do you cook in the early hours of the morning? Pancakes!

My mum (I blog in American! I just wrote 'mom'. Why do I think only American bakers blog?! Aussies, I need to know you're there!) is the pancake queen of our house (I think all houses should have one). She, however, hates pancakes. She eats half a pancake and after half an hour will feel like she's been hit by a truck. So she just cooks them and in return feels the love of her family's full bellies. This might be a good moment to mention my darling mother isn't much of a housewife. She can only cook two things: Thai Green Curry and Pancakes. Both of which are the best you can get your hands on. Until now!

All this baking has left me eating a little too much of the good stuff, so I thought I'd whip up some pancakes for my brother and his friends (containing allergens which means I couldn't eat them even if I was tempted :p) whom I knew would be waking up a feeling a little seedy in the a few hours.

There's something you should know about me. I have a heavily filled bookmarks bar. All my bookmarks have been categorised into folders. These folders have subfolders. And every single link is to a recipe.

A large portion of these recipes are for pancakes.

Perhaps I'm a collector? I've bookmarked pancake recipes from various blogs I've come across, some vegan, some not. Today I opened a lot of these and had a look at what they had in common. Got a bit of an idea and deleted them all. No more pancakes recipes! Well, almost. I still have Manifest Vegan's Pumpkin Maple Pancakes recipe and Triple Chocolate Pancakes recipe (saved as 'BIRTHDAY BREAKFAST ONLY' in my bookmarks bar), but when you click on these links and see the photographs you will understand why.
I then opened the fridge to find.. No milk. No eggs. No butter.
So, dear readers, formed the best pancakes I have ever had, completely 100% accidentally vegan. Oh, and refined sugar free too.

Pancakes: For dairy lovers and vegans alike
makes 10-15 large pancakes
2 cups SR flour
2 1/3 cups almond milk
2 psyllium eggs (or two eggs/other substitute)
4 tbsp butter substitute (I use Nuttelex original), melted + extra
3 tsp stevia (powdered)
Pinch of salt
Dash of vanilla

1. Prepare psyllium eggs by adding 6 tbsp boiling water to 2 tsp psyllium husk, mix and set aside, stirring occasionally.


2. Whisk flour and almond milk. Add melted butter.
3. Once the eggs are good and gluggy whisk them in too, then add the stevia, salt and vanilla.


4. Heat a (preferably flat) saucepan with some butter substitute, then add some pancake mix. Swirl the pan around much easier if you have a fry pan with a handle.. life could be a dream.. to evenly spread the pancake mix and once bubbles form (it won't be long) flip the pancake and cook the other-side until lovely and golden.

You'll notice I don't give a stove temperature of low/med/high here. This will vary depending on the pan you're using/how long you've been cooking the pancakes (I usually have to turn the heat down when I'm about half way through cooking) etc. Just find what's right for your kitchen.

I particularly enjoyed these with long slices of banana and a sprinkle of cinnamon.
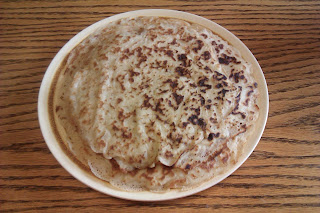


I made a second batch of these and stirred in about 150g of chocolate chips before cooking and these were the ones I actually gave to the seedy teens filling my house. Said teens have been quoted saying "These are the best pancakes I have ever had!", "This is house is amazing to stay at!" and when I told one of them they were vegan and sugar-free (well, apart from the chocolate chips) she said "No way. They were so good!".


The best response? My mum came down as I was making these and ate three in total during the morning. She said she didn't feel at all sick afterwards and half an hour after eating them couldn't tell that she had at all! She loved them. If you know someone who feels rubbish after pancakes, give this a go and see if you can change their outlook on life - pancakes are smiles for the tummy!

Tuesday, 13 November 2012

Cake Decorating Courses, Maths Degrees and Trips to Europe - What a life!

This week I achieved a major milestone. I completed the final exam in my maths major. Phew.
What an incredible(ly) long journey.
Apparently, when I was 8 years old we drove past the Maths and Physics building at UTAS and I said to my mother "I think while I'm deciding what I want to do as my career I'll get a maths degree." Proudest moment of her life, she says. Well, I did it. Why? Good question. It was incredibly painful and apart from the cringe of horror when I became aware that I was making up and laughing at maths jokes in regular conversation, provided little enjoyment to my university experience.

I've been taking part in a cake decorating course through Adult Education and it ended (thankfully) this week. It was.. not great. I learnt a few things - like how to make stunning modelling paste flowers - but it was terribly slow moving and after a full day of intense exam study, three hours of listening to a lady talk about her experiences with left over icing at decorating conferences whilst I watched her make royal icing wasn't really what I was in the mood for.

In the last class we had to leave with a completed cake and I had planned to make a birthday cake for my grandmother with maroon ribbons. Never plan to make anything with maroon fondant. Just don't.
After far too much time spent kneading not-maroon fondant I quit this challenge and brainstormed for another. MATHS!
The following day I had a maths tutorial for my final exam, something the last 8 years of my life had been building up to, and I decided a celebratory cake was in order!

The Maths and Physics Department of our university had the phrase 'Maths and Physics: A Bright Idea!'. I always think of this whenever I see "Maths and Physics" written around our university, but usually follow it with.. 'who's bright idea was this?'. So that was the theme of my cake!


 These photos were sent to one of my many thankful lecturers. The cake was a Coles brand fruit cake and apparently very nice (contained many allergens so I didn't sample). He quoted: Before, and after.


So that was the end of that. Good riddance bye mathematics! This new mathematician will hopefully see nothing of you for a very long time.

NOW LONDON
To say well done, my family congregated on the beautiful Salamanca Lawns to share ciders and fish and chips, play some music together and finally breathe for the first time in months. I took a moment to thank my family for the reliable dinners left out for me each night, putting up with my ranting, and to my poor brother for listening to me fly off the handle about things like eating my food and not washing up. Darling family that I have!
The responded by telling me.. I'm going to LONDON!
My beautiful family have organised a trip to England to celebrate the end of this long period of my life and I could not be more ecstatic. So what did I do to celebrate? I got baking!

I started with Caramel Slice, my boyfriend's favourite. I remembered my cousins birthday dinner was approaching and this happens to be one of his favourites, so made a doubled batch for him as well. This left some extra base as my pan wasn't quite the right size, so I whipped up some lemon curd and made some lemon slice!
My other cousin isn't much of a chocolate fan, but adores lemon so I figured I'd make two young boys happy! These were both packed with dairy and eggs so I couldn't taste as I went, but the willing tasters loitering in my kitchen assure me it is deeelish.
(Also made a failed vegan brownie and some vegan nutella, but they will come later when I've perfected them.) Cheers!


Caramel Slice, Matthew's Favourite
I always make this in triple.. it never lasts long (shhh)

Base:
1 cup plain flour
1/2 cup desiccated coconut
1/2 cup brown sugar
125g butter, melted.

Caramel:
400g tin condensed milk
2 tbsp golden syrup
60g butter

Top:
125g dark chocolate.. and a little bit more

Preheat oven to 180C.
Whisk (replaces sifting) the dry base ingredients together, then add the butter.
Press into a 28 x 18cm lamington pan and bake for 15 minutes until sides begin to golden.
Leave to cool completely (once at room temperature, refrigerate).

Whisk condensed milk, golden syrup and butter over low heat in a saucepan until well combined and somewhat thicker (about 15 minutes). Leave to cool until base is ready - if the base is ready to go there is no need to let it cool!
Pour over cold base and bake in oven for about 15 minutes until set slightly. (Use your judgement).
Leave to cool completely - to room temperature, then in the fridge.

Melt chocolate and pour over chilled base. Get ready to slice it straight away with a HOT knife - once the chocolate has set it will break when cut.
Tip: clean the knife with wet paper towel after every cut to keep the chocolate clean.

Store in the fridge overnight, then in a cool place (fridge or room temperature) until everyone eats it all! (It won't be long, you have been warned).


Lemon Slice
Base: (as above)
1/2 cup plain flour
1/4 cup desiccated coconut
1/4 cup brown sugar
60g butter, melted

Lemon Curd Filling:
I'm told this tastes just like store bought Lemon Curd
4 lemons
4 eggs
1 cup caster sugar
125g butter


Preheat oven to 180C.
Whisk (replaces sifting) the dry base ingredients together, then add the butter.
Press into a 14 x 9cm lamington pan (I've just provided half the size needed for my Caramel Slice, pick and choose!) and bake for 15 minutes until sides begin to golden.
Leave to cool completely (once at room temperature, refrigerate).

Finely zest one lemon and juice all four. 
In a heatproof bowl, whisk together eggs and sugar until well combined, then add lemon, whisking until combined.
Whisk continuously over a bowl of simmering water for about 15 minutes, until custard-like consistency (it's ok to walk away from for a few seconds, but wouldn't for longer than that). You will see a definite change after about 10 minutes, whisk for a little longer. 
Remove from the heat and add butter, whisking to combine. 
Allow to cool completely, then spread over chilled base.

Refrigerate overnight, slice away! It will set to the consistency similar to soft jelly, firmer than it appears below.


Friday, 19 October 2012

Fruit Toast!

Melting butter over lightly toasted cinnamon-scented bread, packed with gooey raisins..

A cup of hot tea with lemon, slices of banana and a delicate glass of almond milk.
The sun is shining through the windows and warming your back as you open the mornings news..

Is there a better way to start your weekend?

I've had enormous cravings for fruit toast for weeks now. One of the biggest disappointments when I discovered my soy allergy was the lack of bread available - in particular fruit bread. This week I desperately needed to get my fix. So I checked out some recipes in my bread-maker book (which are usually no good - milk powder/bread improver/etc.) and compared these to my only successful bread (Sunflower and Flax Bread) to develop my own dairy, soy, egg free fruit bread.
And to great success!


I used plump Australian raisins available at my favourite allergy-friendly shop Eumarrah, not enough cinnamon, ground ginger and cloves, and a little dried apple. I found the apple unnecessary and the recipe below has increased spices, but feel free to increase these more for a super spiced-fruit bread!

This is my first completely self-written recipe, and I am so excited by how well it's worked!
My family and I easily ate half a loaf of this bread (makes 14 fairly standard sized thin slices) straight out of the bread-oven last night, and I'm thrilled by how well it goes toasted with Nuttelex oozing over it; exactly what I was looking for.


Fruit Bread, The Ally-Way.
Disclaimer: I take no responsibility for any damage that may occur when your home smells good enough to eat.

1.5 cups Water
2 tbsp Oil (extra-virgin olive works well)
2 tbsp Agave nectar (or honey)
1.5 tsp Salt
2.5 cups Plain flour
1 cup Almond meal
0.5 cups Hazelnut meal
2 tbsp ground Flax seed
2 tbsp ground Cinnamon
2 tsp ground Ginger
2 tsp ground Cloves
1 sachet/7g Dry yeast
0.5 - 1 cup of Raisins (if these are stuck together take a moment to separate them so they disperse evenly)

Place these in your bread-maker in the order suggested above, with fruit in the fruit-nut dispenser if applicable. Select the basic white cycle for a 1kg loaf and away you go!

This bread improves when allowed to sit and dry out a little after cooking.

Makes a 1kg loaf with approximately 14 slices.
per slice: 210calories, 26g carb, 10g fat and 6g protein


I apologies for no oven baking method here, I do plan to provide a conversion method in the future. 

I must, must, must buy a camera and work on photography...

Friday, 12 October 2012

Green Smoothie

They're all the rage and I've bee convinced to get on the green train.


I'm a bit of a greeny as it is so it only makes sense (joke at my grandmother and mother's birthdays: 'Don't touch the bottom or you'll get green babies! Oh wait - you already have them!').


I came across green smoothies after having a horrid nightmare about having ovarian cancer (creepy? you have no idea). I couldn't get it off my mind and turned to google.. always dangerous. I googled dreams about/causes/symptoms (which, of course, made me certain that I had it) and came across a post on my favourite blog: Anti-Ovarian Cancer "Green" Smoothie. It passes on a heap of brilliant information including the results of studies that have shown that regularly eating endive can decrease your risk of ovarian cancer by 75%!!! I had to get me some of that! And so the green smoothie was created.

Last mother's day I cooked kale for the first time (see my post here for the delicious Paprika Braised Chickpea and Kale recipe) and loved it. Kale comes in a number of varieties with 'curly' and 'dino' (or tuscan) seeming to be the most available (recently I've noticed larger supermarket chains selling dino kale in bags, similar to spinach/other salad mixes). Both varieties are quite bitter and capsicum is fantastic to accompany it.. but that's another conversation.

Why is kale so great? It's green! It's also another cancer-fighting veg (packed with over 40 flavonoids), contains loads of vitamin K (really important for bone health and blood clotting) as well as vitamins A and C. I have kale in all of my smoothies (unless I run out - then I have spinach), and in salads a few times a week.

Back to the smoothies. I did a bit of googling to see what everyone puts in their smoothies and the variety is endless, I suggest you do your own experimenting to find something that suits you.
I wanted fruit and veg and low calorie. I tried adding coconut milk and decided it didn't make much difference. Tried adding flax meal to add more protein but decided it wasn't worth it (didn't make much flavour difference, and doesn't add much protein, really). I haven't tried it, but if you're wanting something sweet pineapple juice might be the way to go, and cinnamon doesn't seem to make any difference at all. It took a few goes to get it just right, but now I've found a mix that suits me there's no way I'm going back!

I have this smoothie around three times a week for breakfast after the gym and it leaves me feeling revitalised for the day ahead:

Ally's Green Power Smoothie
50g of Kale
1/4 head of endive (when I don't make it to the farmer's market I replace this with more kale)
50g blueberries
1 small banana
1 apple (usually a small pink lady, but anything goes)
1-2 cups of water (not sure exactly, I find runnier is better)


Another, sweeter combination that I love:
30g Kale (or thereabouts)
60g Spinach (or thereabouts, more spinach than kale)
50-100g Strawberries (frozen work great if you find a lot on super special!)
1 small banana
1 apple (golden delicious is best here)
1-2 cups of water

Blend them up with a stick mixer and drink up!
(180 - 200cal per smoothie, makes about 800ml)


Go on, you know you want to ;)

Tuesday, 2 October 2012

Paprika Braised Chickpeas with Kale

I posted this recipe on my other blog Adventures of Lady Flutterby after I made it for Mother's Day this year. It's such a brilliant everything-free recipe that I feel it deserves a showing on this page too. The original post can be found here.
This recipe comes from the Gourmet Farmer Matthew Evans book Winter on the Farm. It's a particuarly great winter-warmer, perfect for sunday lunch with the people you love.

I love using my slow-bake casserole dish and filling the house with scrumptious smells. This recipe is vegan and gluten free, as well as free from refined sugars and nuts. It's super healthy and tastes delicious.

Paprika Braised Chickpeas with Kale
from Matthew Evans Winter on the Farm
500g dried chickpeas, soaked overnight, rinsed and drained
10 large kale leaves (or silverbeet if you can't find any)
1 tbsp olive oil
3 large onions, diced
2 bay leaves
1 small piece cinnamon stick
6 garlic cloves, roughly chopped (I reduced this as my grandmother isn't keen on garlic)
3 tsp sweet paprika (I used Spanish)
1 tsp ground cumin
400g tinned chopped tomatoes
1 tsp salt
2 tbsp extra virgin olive oil

Put the chickpeas in a large saucepan, cover with water and simmer for 1 hour, or until they are just starting to become tender, but not cooked through. Drain well, reserving the cooking liquid and set aside. Strip the soft green part from above the the ribs of the kale leaves and set aside.
Heat the olive oil in a large saucepan over medium heat. Add the onion, bay leaves and cinnamon and cook for 10-15 minutes, or until the onion starts to brown. Add the garlic and cook for 1 minute, then reduce the heat, add the paprika and cumin and cook for 30 seconds, stirring constantly and being careful not to scorch the spices. Add the tomato, kale and 500ml water and stir to combine.
Add the chickpeas and salt to the pan with just enough of the reserved cooking liquid to cover. Bring to boil, then reduce the heat to low, cover and simmer for 1 hour or until the chickpeas are buttery soft.

Alternatively, you can cook this dish in a 140 degree oven for 2 hours.
Just before serving, season with salt and freshly ground black pepper and stir in the extra virgin oilve oil. Serve warm with turkish bread.

Friday, 21 September 2012

Seriously Evil Devil's Food Cake (not gluten free)

Nigella Lawson is a goddess.
I have adapted this recipe from her Devil's Food Cake recipe and replaced the eggs and dairy and my goodness it's been a success!
This is the kind of cake that makes chocolate lovers drool. It's so rich the end of a second slice will make you wish you hadn't so soon, but every crumb takes you to a new level eurphoria. 

This cake is super-rich so when making for children I suggest serving it with vanilla icecream, and for adults offering greek yogurt, double cream or creme fraiche (I offered all three at our afternoon tea). But for those of us who can't delve into these dairy-filled delights, I find a good strong cup of tea (or three) accompany it superbly.

I've made it twice now: it worked well as a shaped pirate cake for my nephew's 4th birthday (I added powdered sugar to the icing to stiffen it), 


and a fantastically rich afternoon tea cake beside French Earl Grey tea** for my Grandmother's 75th birthday (a great way for me to use my new cake stand). Unfortunately I have no photos of this occasion... Obviously that means I'll need to bake it again - oh no! :D


Devil's Food Cake
For the cake
- 2.5 tsp psyllium husk
- 7 tbsp boiling water
- 50g cocoa powder
- 100g dark brown sugar
- 250mL boiling water
- 125g dairy, soy free margarine (I use Nuttelex Original)
- 150g caster sugar
- 225g plain flour
- 1tsp baking powder
- 1 tsp bi-carb (baking soda)
- 2 tsp vanilla

For the frosting
- 125ml water (from your pre-boiled jug is fine)
- 30g dark brown sugar
- 175g dairy, soy-free margarine (again, Nuttelex Original is my preference)
- 300g dark chocolate, chopped (I prefer 85% Lindt Excellence, or 70% if you're after something a little lighter)

Method
1. Preheat oven to 180oC.
2. Prepare your egg substitute: mix 2.5 tsp psyllium husk with 7tbsp boiling water and set aside until needed, stirring every now and again.
3. Use a hand whisk to mix cocoa and brown sugar together, then add boiling water. Set aside.
4. Cream butter substitute and caster sugar (I use my Breville MixMaster so I can start the next few steps while this is happening).
5. Mix together flour, baking powder and bi-carb.
6. When the butter and sugar is pale and fluffy add vanilla whilst still mixing. Add half the egg mixture, and immediately add 1 spoonful of the flour mix. When this is combined, repeat with remaining egg mix and flour.
7. Once combined, gradually add the cocoa mixture.
8. Scrape your bowl with a rubber spatula (I think the most satisfying sensation when cooking is scraping that last little bit out of the bowl - am I crazy?) into TWO baking paper lined cake tins and bake for about 30 minutes, until an inserted skewer comes out clean.
9. Leave your cakes for 10-15 before removing from the cake tins and let them cool before icing.

As soon as you bung them in the oven get onto that delicious icing!

Icing
1. Place the water, sugar and butter in a small saucepan over low heat to melt, stirring every now and again to combine.
2. Once the mixture starts to boil, remove from heat and add chopped chocolate, stirring slowly to all the chocolate to melt. 
3. When melted, hand-whisk your mixture until smooth. Set aside to let cool for an hour (the time it will take for your cake to cook and cool), whisking every now and again.
The icing will be quite runny to begin with, but after the hour will thicken surprisingly.

4. When your cake is cool and your icing is thick smother one half of the cake with about a third of the icing, place the other half on top and cover the whole thing! 

ENJOY!


**French Earl Grey is my latest discovery from the new T2 store that's opened in Hobart. All the ladies in my family - except me - love Earl Grey tea, and this is a compromise that both the Earl Grey lovers and haters both adored. It's more fruity than traditional Earl Grey, but less perfumed. 


Bread (not gluten free.. yet)

The week I found out I was dairy, egg and soy intolerant I visited the supermarket on my way home from a very long day. Trying to figure out what I could possibly buy to eat the following morning for breakfast (I was dreading cereal without soy or cows milk - I now use almond milk and love it) I thought fruit toast would make it all better. Until I found soy flour was used to make it. All the brands. So I shrugged it off and went to choose my favourite farm-style bread to toast with honey. Checked the  ingredients just to make sure: soy flour.
Every single bread in this major chain supermarket contained soy flour. ARGGHHHHHH. I just about spat the dummy and had a trantrum my nephews would be proud of with fists waving and feet stomping then and there in isle 1.

BREATHE. I called my mother instead.
And what became of that? The darling woman bought me a bread maker!
A recipe and instruction book came with it with recipes for plain white, wholewheat, fruit loaves and all sorts. Unfortunately many of these contain dairy/egg/soy so they needed to be adapted - but the only one I've tried from there was a big flop so I've left the book for now and done my own hunting.
Ultimately I wanted a bread that was packed with protein and could make a healthy snack on its own. I've found this great Flax and Sunflower Seed recipe that tastes amazing and works every time.


I want to alter this to make a gluten free loaf as well. I've had one go at this so far using hazelnuts and different protein flours but none have yet been successful. I WILL keep trying and will pass on any successes (which will come!).


Flax and Seed Bread
Makes 14 slices (153cal per slice)
- 1 1/3 cups water
- 2 tbsp light olive oil
- 2 tbsp honey
- 1 cup plain four
- 1 cup whole wheat flour
- 1 cup protein flour (Sorghum works great, you can also experiment with others or just halve this between plain and whole wheat flour)
- 1 tsp salt
- 1 tsp active dry yeast
- 1/2 cup ground flax seeds (I use a coffee grinder but you can buy pre-ground)
- 1/2 cup mixed seeds (sunflower, pepitas, poppy or a blend of any you like!)


Place all ingredients except the whole seeds into your bread maker, give them a mix (my bread maker doesn't mix particularly well) and select a basic cycle for a 0.75kg loaf. Place the seeds in your fruit/nut depositor or add them just before the rising stage begins.